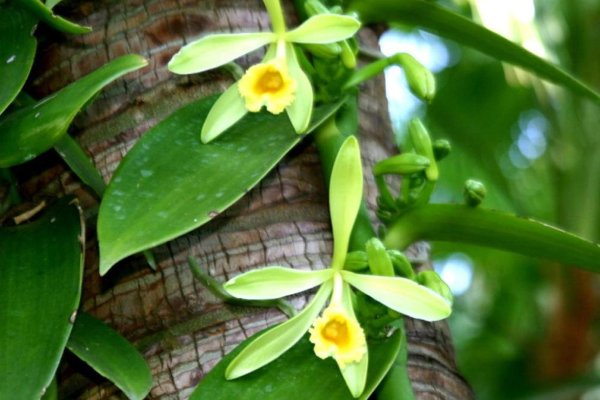
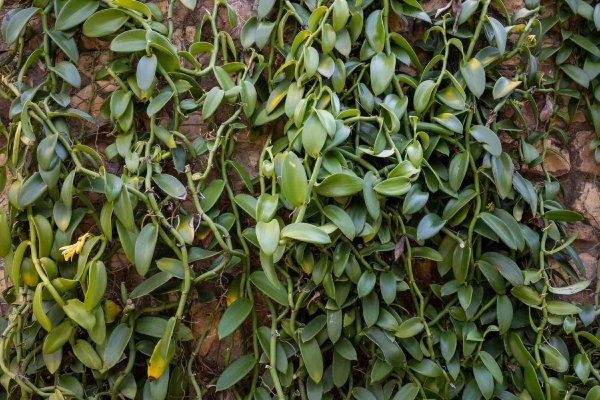
Vanilla Beans Orchids, known scientifically as Vanilla planifolia, are evergreen plants that grow as epiphytic vines. They are famous for their attractive flowers and the edible pods they produce. This orchid is special because it is the only type that produces fruit you can eat. These seed pods are mainly used to extract natural vanilla flavoring which is widely used in desserts and drinks. This plant has very long, thick stems that climb up the trees by their tiny roots. Similarly, the flowers are greenish-yellow. If it is not in its native environment, flowers have to be hand-pollinated to produce fruit.
In this guide, we will further learn more about the Vanilla Bean Orchid.
Plant Descriptions
Plant Type: Vine, Perennial
Scientific Name: Vanilla Plantifolia
Common Name: Vanilla Orchid, Vanilla, Flat-leaf vanilla, West Indian vanilla
Genus: Vanilla plantifolia
Family: Orchidaceae
Season: Spring
Native Area: North America, Caribbean, Central America
What are the characteristics of a Vanilla Bean Orchid?
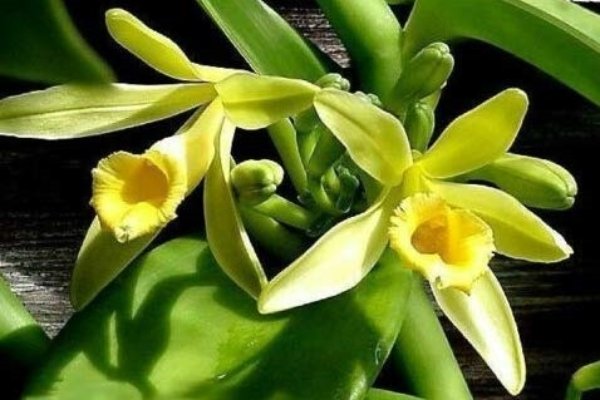
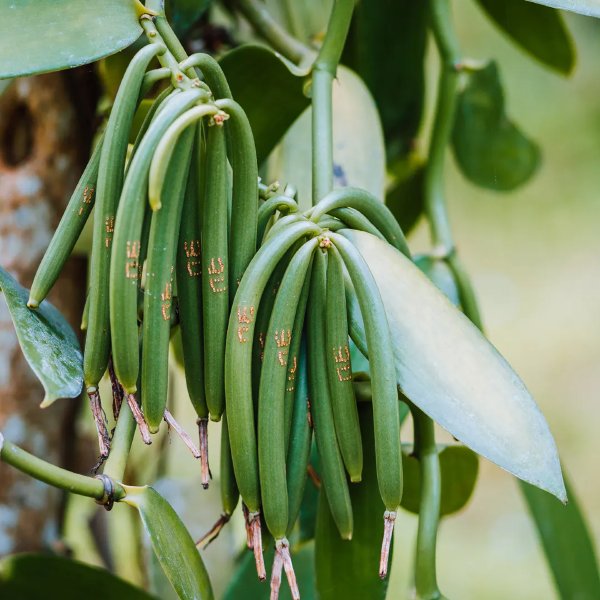
The Vanilla Bean Orchid grows with vines that have fleshy stems and flat leaves that can grow up to 5 inches long. While its aerial roots cling to trees to help it climb. It also produces yellow-green flowers that bloom in clusters of 12 to 20 buds. However, its flower only lasts for a day. Similarly, the primary characteristic of Vanilla Bean Orchids is their fruit pods which are 6-10 inches long. Each pod is filled with thousands of tiny black seeds.
Can Vanilla Bean Orchid grow as a houseplant?
Yes, you can grow a Vanilla bean orchid as a houseplant, but it will rarely bloom or bear vanilla beans in the home environment. Growing a Vanilla bean orchid indoors is usually done by experienced gardeners who can able to meet its specific needs. The plant requires highly controlled conditions and sometimes has to be hand-pollinated to form seeds. Well, it is a high-maintenance plant, and hence very challenging to beginners.
The plant prefers a warm, bright location. However, it should not be placed at a hot draft from the furnace as this could harm the plant. Low humidity can also be an issue for the plant to thrive in the home environment. But this can usually be fixed by using a humidifier. You should place the plant on trays filled with pebbles and add water to the saucer underneath. Further, vanilla bean orchid typically grows very tall so, it is quite challenging to manage.
How to care for Vanilla Bean Orchid
The Vanilla Bean Orchid is quite a demanding and highly challenging plant to grow for beginners. If you grow a vanilla orchid as a houseplant, it will take around four years to mature and bloom. Here are some tips on how to care for your vanilla plant:
Light
Vanilla Bean Orchid prefers bright, indirect light to partial shade. They need enough light to flower, but too much direct sunlight can cause them to burn. Well, they can easily handle brief periods of morning sun with indirect light. However, avoid placing the plant near south-or-west-facing windows as they get direct sunlight in the afternoon which is too strong and intense for the plant.
Soil Preparations
Like many other epiphytes, vanilla bean orchids are prone to root rot. So, it is important to use a well-draining potting mix. Well, you can also use ready-made orchid mixes or create your own by combining coco coir, perlite, and bark chips. This mix provides good drainage and nutrients which helps the plant to grow efficiently. Similarly, once the plant develops its epiphytic roots, it won’t need regular potting mix.
Water
Keep the potting medium lightly damp but not soaking wet. During the growing season, water the plant about two or three times a week. However, you should reduce the frequency of watering during winter. Let the potting mix dry out a bit between waterings to avoid root diseases.
Temperature and Humidity
Vanilla orchids thrive in high humidity and should be kept in an environment where nighttime temperatures stay above 55°F and daytime temperatures are between 80 to 95°F. These orchids are not resistant to frost, so those living outside tropical climates should grow them in a greenhouse. Regular misting is necessary, and you should aim to keep the humidity at around 80 percent.
Fertilizer
During the spring and summer, you should fertilize your Vanilla Bean Orchid every two weeks with a diluted, liquid organic fertilizer. This helps keep the plant healthy and promotes flowering. Since different fertilizers have different dosage recommendations, it is important to follow the instructions provided on the fertilizer packaging.
Pruning
Vanilla bean orchids usually do not require pruning. However, you can trim the plants if they become too large or if you want to take cuttings for propagation. To trim, choose a section of the vine below a growth node and cut it with clean, sharp gardening shears or pruners.
Pests and Disease
Vanilla Bean Orchids can be affected by common pests like mealybugs and spider mites. These pests can damage the plant, weaken it, and create unattractive spots on the leaves. To prevent and manage these pests, you can use horticultural oil or a solution of gentle dish soap mixed with water. Additionally, you can apply rubbing alcohol to the pests with a cotton swab to stop their spread.
Harvesting Vanilla Beans Orchids
Typically, vanilla beans are harvested by commercial farmers. The Aztecs were the first to use vanilla beans to flavor their food. While you can grow a vanilla plant at home, the flowers won’t produce beans unless you hand-pollinate them. This process requires patience, as the beans take about nine months to grow.
To hand-pollinate the vanilla flowers, do it within 12 hours of blooming using a chopstick. Transfer pollen from the stamen of one flower to the stigma of another. If pollination is successful, your vanilla plant will produce green pods. These pods will mature and be ready for harvest in about 9 to 10 months. Good pods should be at least six inches long.
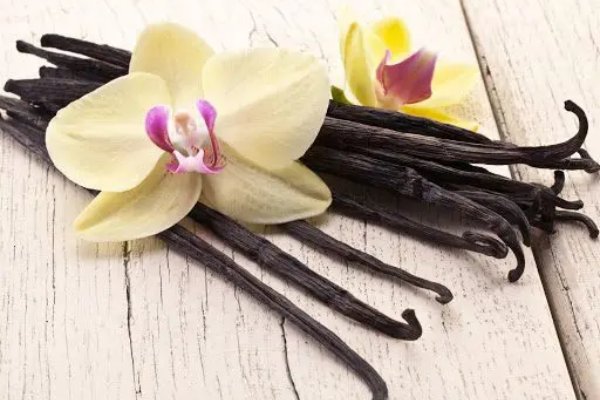
After harvesting, vanilla beans must be cured before using them for vanilla extract or flavorings. To cure them, expose the beans to bright, warm sunlight all day and wrap them in cloth at night to promote condensation. Once the pods are dark and shriveled, store them in a dark, dry place for another month to complete the curing process and enhance their flavor.
Vanilla Bean Orchid Propagate
This orchid can be grown from seeds, but this method is complicated and not reliable. A simpler and more reliable way to grow a new vanilla orchid is by using stem cuttings. Here is a step-by-step guide to follow in propagating the vanilla bean orchid:
Select and Prepare the Cutting: Choose a healthy vine from the parent plant with several growth nodes. Cut it off and remove the two lowest leaves from the cutting.
Prepare the Pot: Get a small flower pot and fill it with either moist sphagnum moss or a mix of orchid bark, peat moss, and perlite.
Plant the Cutting: Insert the cutting into the pot, burying the lower nodes in the growing medium. Firmly press the medium around the base of the cutting.
Support the Cutting: Place a plant stake in the pot and attach the cutting to it with ties for support.
Provide Proper Light: Place the pot in a bright, indirect light and continue to keep the substrate damp until the cutting develops roots.
Maintain Moisture: Keep the growing medium damp for four to six weeks until you see new growth. Once the cutting starts to the vine, you can move it to a larger trellis.
Common Problems of Vanilla Bean Orchid
Sun-damaged leaves are a common issue for vanilla bean orchids which is caused due to intense sunlight. These orchids are very sensitive to sunlight, so direct light can cause the leaves to become scorched or crispy. To prevent this, you should move it to a spot with a dappled shade. Similarly, you can see yellow leaves on your vanilla orchid which is caused because of overwatering. Other problems you may observe in an overwatered orchid are flowers falling off, drooping or wilting of the stem, or the rotting of its root. To prevent root rot, ensure there is some air circulation and good drainage around the plant.
Similarly, when your plant is underwater, you may see similar issues with different root symptoms. Your roots start turning brown if the plant is too dry. In such cases, you should water the plant thoroughly and increase humidity levels.
Conclusion
In conclusion, the Vanilla Bean Orchid (Vanilla planifolia) is a fascinating and unique plant renowned for its edible pods. These seed pods are mainly used to extract natural vanilla flavoring. The plant is an evergreen vine that thrives in tropical climates but can also be grown as a houseplant with the right care. Nonetheless, growing this plant as a houseplant can be challenging. It required high humidity, bright indirect light, careful watering, and regular fertilization. Additionally, growing the Vanilla Bean Orchid takes patience, especially when it comes to hand pollination. Nevertheless, experienced gardeners might find it rewarding because of its beauty and the chance to grow vanilla beans in the home environment.
Frequently Asked Questions
1. What are Vanilla Bean Orchid?
Vanilla bean orchids are evergreen vines that are famous for their attractive flowers and edible seed pods. This orchid is special because it is the only type that produces fruit you can eat. These seed pods are mainly used to extract natural vanilla flavoring which is widely used in desserts and drinks.
2. How tall do Vanilla Bean Orchid grow?
In their natural habitat, Vanilla Bean Orchids can grow reaching heights of 30 to 50 feet. However, when grown indoors as houseplants, they don’t grow as tall but still need support like a trellis or stake to climb properly.
3. Where does the Vanilla Bean Orchid grow?
This orchid grows in tropical climates, particularly in North America, the Caribbean, and Central America.
4. What challenges do Vanilla Bean Orchids face indoors?
Vanilla orchids may face challenges such as leaves getting damaged from direct sunlight, yellowing caused by overwatering, and infestations by pests like mealybugs and spider mites.
5. How do you propagate Vanilla Bean Orchid?
The easiest way is through stem cuttings. Selecting a healthy vine, removing the lower leaves, and planting it in a moist growing medium. Similarly, it needs support to climb the vines and keep the soil damp until roots grow and new shoots appear.
